Table of Contents
The Timeless Appeal of the Forest Guardian
The practice of owl wood carving represents a unique intersection between the raw beauty of nature and the meticulous precision of human artistry. For centuries, woodcarvers have been drawn to the owl as a subject of study, captivated by its enigmatic presence and the complex textures of its plumage. There is a specific kind of magic that occurs when a craftsman takes a silent, stationary block of wood and, through a series of intentional cuts, reveals the alert and watchful form of a bird of prey. This artistic pursuit is not merely about removing excess material; it is about understanding the essence of the creature and translating its biological complexity into a medium that is both rigid and organic.
Wood as a medium offers a tactile connection to the natural world that few other materials can match. When an artist engages in owl wood carving, they are essentially collaborating with the tree itself. The grain of the wood, its scent, and its density all play a role in the final outcome of the piece. The owl, with its large, expressive eyes and its intricate feather patterns, provides an ideal canvas for exploring the limits of what can be achieved with hand tools and power equipment. It is a subject that rewards patience and punishes haste, requiring the carver to slow down and observe the subtle nuances of light and shadow that define the avian form.
The Historical and Cultural Significance of the Owl
Before the first chip of wood is removed, it is helpful to consider the deep well of symbolism that informs owl wood carving. Throughout human history, owls have occupied a prominent place in the collective imagination of various cultures. In Ancient Greece, the owl was the sacred companion of Athena, serving as a symbol of wisdom, strategy, and divine insight. This association has persisted into the modern era, where the “wise old owl” remains a staple of literature and folklore. For a carver, capturing this sense of intelligence and stoicism is often the primary goal of a project.
Conversely, in many other traditions, the owl has been viewed as a mysterious and sometimes fearsome messenger of the night. Some Native American tribes regarded the owl as a guardian of the spirit world, while in other cultures, its nocturnal habits led to associations with the hidden and the occult. When an artist chooses owl wood carving as their focus, they are tapping into these ancient archetypes. A carving of a Great Horned Owl may convey power and ferocity, while a Barn Owl sculpture might emphasize elegance and spectral beauty. Understanding these cultural layers helps the artist imbue their work with a narrative quality that goes beyond mere physical representation.
Selecting the Foundation: Woods for Every Level of Skill
The success of any owl wood carving project is heavily dependent on the selection of the appropriate timber. For those who are just beginning their journey, softness and grain consistency are the most important factors to consider. Basswood is the undisputed favorite among novice carvers and professionals alike. Its grain is exceptionally fine and straight, which means the wood is less likely to split or splinter when the carver is working on delicate areas like the beak or the tips of the wings. Basswood provides a clean, neutral surface that takes detail remarkably well and is easily painted or stained.
As a carver gains confidence and experience, they may choose to experiment with hardwoods that offer more character and durability. Butternut, often referred to as white walnut, is a beautiful choice that is relatively soft but possesses a much richer color and grain pattern than basswood. For master-level owl wood carving, hardwoods such as black walnut, cherry, or even oak are favored for their longevity and natural luster. These woods are much more difficult to carve and require tools with a razor-sharp edge and a great deal of physical effort, but the finished result is a museum-quality piece that can last for generations. The choice of wood ultimately dictates the “feel” of the carving, with lighter woods suggesting a sense of flight and heavier, darker woods grounding the bird in a more earthbound, powerful stance.
The Toolset: Bridging Tradition and Technology
A woodcarver’s tools are an extension of their hands and their vision. In the realm of owl wood carving, the variety of tools available can be overwhelming to a newcomer. Traditional hand carving relies on a selection of knives, gouges, and chisels. A primary carving knife is used for the “roughing out” phase, where the large masses of the bird’s body are established. Following this, gouges of various sweeps—the degree of curvature in the blade—are used to create the hollows of the eyes and the sweeping curves of the folded wings. The V-tool is perhaps the most critical instrument for adding the fine, rhythmic lines that represent individual feathers.
In recent years, power carving has become increasingly popular within the owl wood carving community. High-speed rotary tools equipped with carbide burrs and diamond bits allow the artist to remove wood quickly and achieve levels of detail that would be nearly impossible with hand tools alone. These power tools are particularly useful for texturing the feathers and creating the intricate “facial disc” that is characteristic of many owl species. However, even the most modern power carver usually returns to traditional hand tools for the final, subtle refinements that give a sculpture its soul. Regardless of the method chosen, the most important aspect of tool maintenance is sharpening. A dull tool is dangerous and produces ragged, unattractive cuts, whereas a sharp blade glides through the wood like a hot knife through butter.
Anatomy and Observation: Finding the Bird in the Block
To create a convincing owl wood carving, one must become a student of avian anatomy. Owls are unique among birds for several reasons, and these physical traits must be accurately represented in the wood. The most striking feature of an owl is its head. Unlike most birds, owls have forward-facing eyes, which gives them a humanoid appearance and a powerful, focused gaze. The carver must pay close attention to the placement and depth of the eyes, as even a slight misalignment can make the owl look comical rather than majestic.
The body of the owl is typically robust and barrel-shaped, but this mass is hidden beneath layers of thick, soft feathers. When performing an owl wood carving, the artist must balance the underlying structural form with the outward appearance of softness. The wings, when folded, create a series of overlapping planes that follow the curve of the body. Understanding how these flight feathers lay over the secondary feathers is essential for creating a realistic silhouette. Furthermore, the talons are a crucial but often overlooked detail. An owl’s feet are incredibly powerful, and carving them with the correct tension and grip around a wooden perch adds a sense of life and action to the piece.
The Process of Creation: From Vision to Rough-Out
The journey of an owl wood carving project usually begins with a series of sketches or the use of a pre-made pattern. Many carvers prefer to draw their design directly onto the wooden block from multiple angles—front, side, and back. This ensures that the proportions remain consistent as the wood is removed. The first stage of the physical work is known as the “rough-out.” This is a bold and energetic phase where the carver uses large gouges or even a saw to strip away the corners of the block and reveal the basic cylinder of the owl’s body.
During the rough-out, it is important not to get bogged down in details. The focus should be on the overall gesture and posture of the bird. Is the owl looking straight ahead, or is its head turned at a sharp angle? Are the wings tucked tightly against the sides, or is the bird preparing to take flight? By keeping the forms simple and geometric at this stage, the carver avoids making irreversible mistakes early on. As the excess wood falls away, the general shape of the head, the taper of the tail, and the position of the perch begin to emerge from the timber, providing a solid foundation for the more intricate work to follow.
Refining the Form and Establishing Character
Once the rough silhouette is complete, the owl wood carving enters the refinement stage. This is where the artist begins to define the specific features that give the owl its character. The transition between the head and the shoulders is smoothed out, and the facial disc is carefully carved into the front of the head. This heart-shaped or circular area acts as a frame for the eyes and beak, and its depth helps create the shadows that define the owl’s expression.
During refinement, the carver also begins to separate the different groups of feathers. The “cape” of feathers on the back, the primary flight feathers on the wings, and the soft down on the belly are all given their own distinct levels and boundaries. This stage requires a lighter touch and more frequent stops to observe the piece from a distance. It is during these moments of reflection that the carver can identify where more wood needs to be removed to create a sense of depth or where the symmetry needs to be adjusted. The goal is to create a form that feels balanced and natural from every viewing angle.
The Master Class of Texture: Carving the Feathers
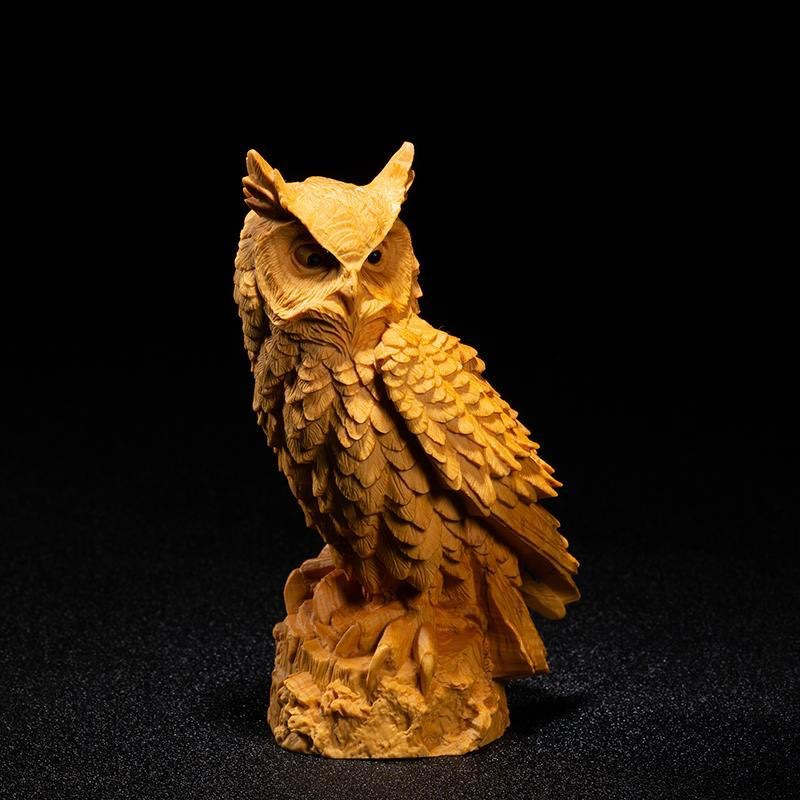
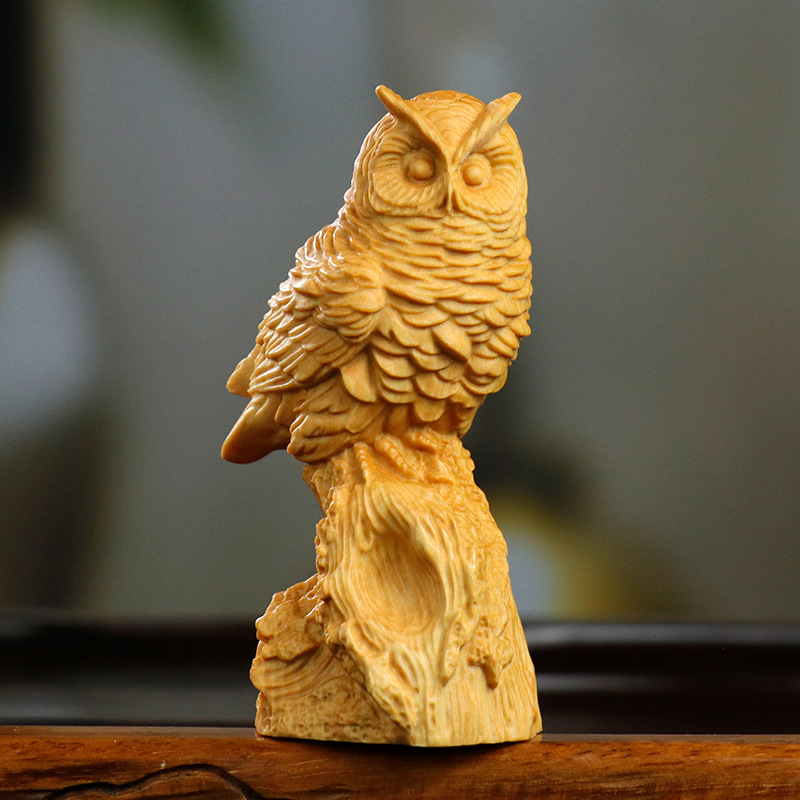
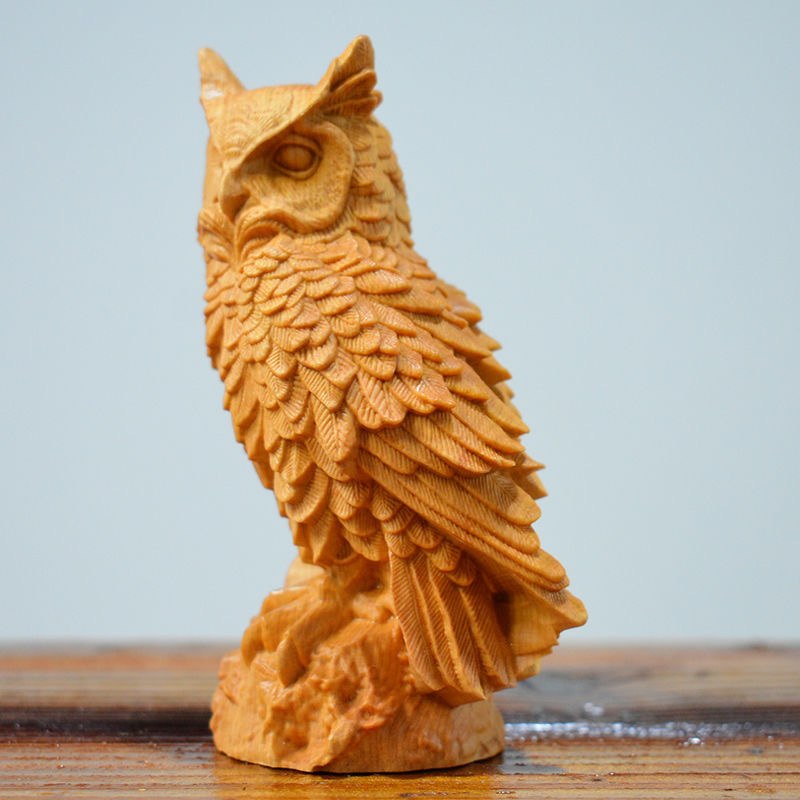
The most time-consuming and perhaps the most rewarding part of owl wood carving is the texturing of the feathers. This is the process that transforms a smooth wooden shape into something that looks like it could rustle in the wind. There are several techniques for achieving this effect. Some carvers use a “stipple” technique with a small point to create the appearance of soft down, while others prefer the clean, rhythmic lines produced by a V-tool.
To carve feathers effectively, one must understand the direction in which they grow. Feathers always radiate away from the beak and eyes, flowing down the neck and across the body toward the tail. By following this natural flow, the carver creates a sense of movement and realism. For high-end owl wood carving, artists often use wood-burning tools to add even finer details. This process, known as pyrography, allows the artist to burn individual barbs into each feather, creating a level of microscopic detail that captures the light in a way that carving alone cannot. The combination of deep carving and fine burning creates a tactile surface that is as interesting to touch as it is to look at.
The Soul of the Sculpture: Eyes and Expression
It is often said that the eyes are the windows to the soul, and this is certainly true in owl wood carving. The eyes are the focal point of the entire piece, and they are what truly bring the owl to life. Some carvers choose to carve the eyes entirely out of wood, using a series of concentric circles and a high-polished finish to suggest the wetness of a real eye. Others prefer to use glass or acrylic eyes that are inset into the wood. These pre-made eyes can offer a startling level of realism, with pupils that seem to follow the viewer around the room.
If carving the eyes by hand, the artist must be careful to make them symmetrical and deep-set. The brow ridge above the eye is equally important, as it determines whether the owl looks curious, angry, or serene. The beak, which sits just below and between the eyes, should be carved with a sharp, hooked tip, suggesting the predatory nature of the bird. By focusing on these small but vital details, the carver ensures that the owl wood carving has a presence and an “attitude” that resonates with the observer.
Color and Finish: Enhancing the Natural Grain
The final stage of owl wood carving is the application of color and finish. Some artists prefer the “natural” look, where the beauty of the wood grain is the star of the show. In these cases, a simple application of clear oil, such as linseed oil or tung oil, is used to protect the wood and deepen its natural color. The oil penetrates the fibers, highlighting the textures created by the carver and giving the owl a warm, organic glow.
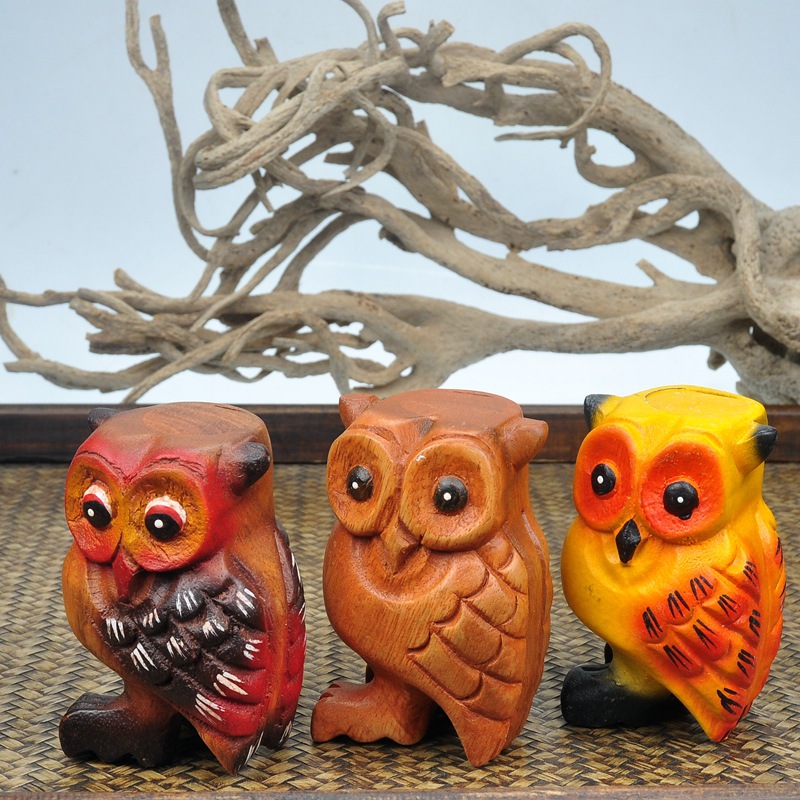
Other carvers choose to paint their work to match the specific markings of a certain species, such as the mottled brown of a Great Horned Owl or the snowy white of an Arctic Owl. The key to painting an owl wood carving is to use thin, transparent washes of color rather than thick, opaque paint. This allows the carved texture and the grain of the wood to remain visible through the pigment. After the paint has dried, a final coat of wax can be applied and buffed to a soft luster. This not only protects the piece from dust and moisture but also gives it a professional, finished appearance that is ready for display.
The Lifelong Journey of the Woodcarver
Mastering the art of owl wood carving is a lifelong pursuit. Each project offers new lessons in patience, technique, and observation. No two pieces of wood are exactly alike, and therefore, no two carvings will ever be identical. This inherent variety is what keeps the craft fresh and exciting for those who practice it. Whether you are carving a small, stylized owl to sit on a bookshelf or a massive, lifelike sculpture for a garden, the process remains a deeply personal and meditative experience.
As you progress in your skills, you may find yourself looking at owls in the wild with a new level of appreciation. You will notice the way the light hits their feathers, the specific curve of their talons, and the intense focus in their eyes. This connection to the living world is the true reward of owl wood carving. It is a hobby that encourages a deeper understanding of nature and provides a tangible way to celebrate the beauty of the forest’s most mysterious inhabitant. Through the marriage of wood and imagination, the carver ensures that the spirit of the owl will continue to watch over us from its perch on the mantle.
Conclusion
In conclusion, the craft of owl wood carving is a rich and multifaceted art form that offers something for everyone, from the casual hobbyist to the professional artist. It is a practice that requires a unique blend of technical skill, anatomical knowledge, and artistic intuition. By carefully selecting the right wood, mastering the necessary tools, and paying close attention to the details of the owl’s form and expression, a carver can create a work of art that is both beautiful and meaningful. The silent guardian of the woods, captured in the warm embrace of timber, stands as a testament to the enduring power of handmade craftsmanship in an increasingly digital world.
How to purchase:Online B2B sourcing platform, China purchase, Chinese suppliers – LooperBuy
Frequently Asked Questions
1. What is the best type of wood for a beginner to use?
For anyone starting out in owl wood carving, basswood is the most recommended option. It is soft, has a very minimal grain that does not interfere with small details, and is widely available at most craft or woodworking stores. Its light color also makes it very easy to paint or stain once the carving is complete.
2. Do I need expensive power tools to carve an owl?
Not at all. While power tools can speed up the process, many of the most beautiful owl carvings are created using nothing more than a few sharp hand knives and gouges. Hand carving allows for a quieter, more meditative experience and provides the carver with a greater degree of control over every single cut.
3. How do I prevent my wood carving from cracking over time?
To prevent cracking, it is important to use wood that has been properly seasoned or dried. Once the carving is finished, applying a high-quality finish like oil or wax will help seal the wood and prevent it from absorbing or losing moisture too quickly, which is the primary cause of splitting and warping.
4. How long does it typically take to finish a detailed owl carving?
The time required depends entirely on the size and complexity of the project. A small, simple whittled owl might take only a few hours, while a life-sized, highly detailed owl wood carving with intricate feather textures and pyrography can take dozens or even hundreds of hours to complete to a professional standard.
5. Can I use wood found in my own backyard for carving?
Yes, you can certainly use “green” wood from your yard, but you must be aware that it will shrink and possibly crack as it dries. If you choose to use found wood, it is often best to rough out the shape while the wood is still fresh and then let it dry slowly in a cool place before doing the final detail work and finishing.
HOT TAGS:
owl wood carving, woodcarving techniques, handmade wooden art, avian sculpture, basswood carving, DIY woodcraft, owl symbolism, feather texturing, wood finishing, pyrography, traditional crafts, whittling, hardwood carving, woodcarver tools, artistic woodworking, wildlife art, rustic home decor, forest guardian, carving for beginners, handmade gifts, wood grain art, sculpture process, bird of prey art, creative hobbies, wooden heirlooms.